Libre graphics is the idea of a range of open and free software for artist to use. It also makes you to think about your tools. The software can be modified and you can set your own tools.
This idea starts with Richard Stallman when he decided to set 4 freedom disarming developers from control:
1. To run programs as you wish in a way that you can open up audacity and create images.
2. To study how a program works and change it.
3. Redistribute copies.
4. Distribute copies of modified versions.
For this workshop we will work in two of the three free licensed softwares: GIMP and INKSCAPE being also SCRIBBLES a free open software.
After watching the short-film "Powers of ten" by Charles and Ray Eames we are asked to think about an object and how we can scale it to the universe. We need to create a poster using GIMP and INKSCAPE.
We need to consider:
- How does it scale?
- What universe?
- What about scaling the space around it?
- How can we used our tools in a interesting way
"Scaling to the universe"
"Scaling to the universe"
"Scaling to the universe"
"Scaling to the universe"
"Scaling to the universe"
CLICK ME
On the video on the left hand side, called "Presumptions" is a good example of scaling and perspective. About scaling it shows how different objects can be larger dependending how you set then within space. Also it plays with our knowledge , for example we know that a chair is always bigger that a cup of tea, so our brain always think with perspective.
To create these images I have used Inkscape.
For that first I created a new document and I changed the settings:
Document properties - A2
Left:
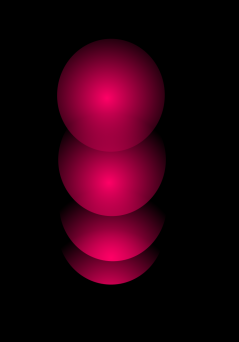
In this image I show the different texture and their names that you can find in this open software, I create circles and I applied different textures to them.
Right:
Here I have scaled the planets in the solar system. I created a background by doing a rectangle with Filter- Film grain. For the rest of the planets I have chosen different filters based on my previous poster.
I have done the same with the text.
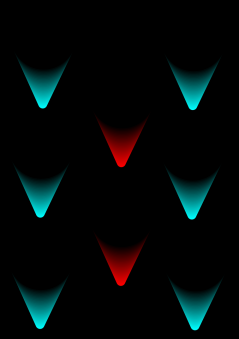
Left:
In this illustration I have sacale the planets again but this time enclosing the planets with each other. For this again I have used the same method than before. Making circles and applying filters.
I have created the 3 images on the right by using a tool call "Interpolation", I think this tool is the most succesful to scale things on Inkscape, also I thinK that the effect produced is very beautiful and has a lot of visual power.
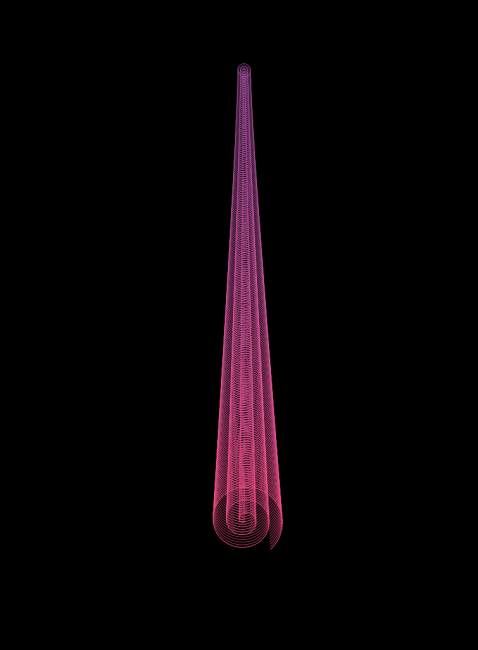
1.For this image I created a large circle and another one smaller in the centre of the large one, with Interpolation, for this first I clicked PATH-CONVERT OBJECT TO PATH, and after EXTENSION-INTERPOLATION, that created the steps between two shapes, I applied FILL - RADIANT GRADIENT to do color effect and after I duplicated the shape 3 times. Mi idea was to scale the gradient, no the shape, the shape is the same but what we can see is that the gradient has been displaced, for this I click each of the shapes and then with the tool EDIT PATHS BY NODES I could move the gradient within the shape. I love the result of this exploration because it looks 3D .
1
2
3
After I created a background with the same color than the shape at the top. I duplicated the interpolation y changed the color. The result is as image with shapes that give de sense of moving, going down. What is scaled here are the colors that make the shape moving.
3. In the third image I wanted to explore the same by using stroke only, also I think is nice because we can perceive all the steps between the smallest and the largest shape. This is important because when we scale thing we need to consider the process.
Images on the right are more exploration of the same tool.
2. Here I created a large and small circle again but this time placing the smallest down and two different colors I INTERPOLATED following the same way that I mentioned above, setting INTERPOLATION to 100 steps. The result was something like that :
I took this image on my way from Madrid to London, we were taking off and I saw this amazing sky, full of textures and colors. I will use this image to manipulate it on GIMP.
for the image on top I zoomed in the patterns on the sky to make this circles Illustration.
About the image on the left applied some filters:
FILTERS-GENERIC-DILATE, is generated brightness to the image
FILTERS-SHARPEN, it gave more details to image
RENDER-CLOUDS, it transformed the image and the colors by applying clouds textures and overlaying the layer with mode DIFFERENCE.
I wanted to keep the style of the illustrations that I made with INKSCAPE, I tried to import the circles to INKSCAPE to make and INTERPOLATION between the circle to see the effect but it didn't work. It is being very hard for me tu use GIMP because when I try to copy elements it closes automatically and I need to restart the process. INKSCAPE is very complete and I find it very useful but in GIMP there are some tools missing that I think are indispensable.
I have created the image by pasting layer into each other but making them smaller,this way is like a zoom in to scale the image.
The on the left is being created by pasting layer sagian but this time changing perspective. Here I tried to show how we can use perspective than I mentioned at the beginning to scale things.